Tuesday, December 28, 2010

Old Product in New Color... a Challenge


counter_r_1 100_5147_r

The last time I went to Joann, I found these row counters that appear to be purple! I bought all of the ones that I saw and they were not enough. They match my beads beautifully! The problem is that since the supply is limited and costs more, I'm having to jack up the price of these sets. Even worse, the item number of the ones that come in this color is the same as the red ones.

I'm hoping to contact some suppliers to find out when they will be getting these row counters in this color. What I need to do is invade the makers of these gizmos and tell them to have these row counters made in colorful sets of two: one pink and one purple, one yellow green with one aqua blue, one baby blue with one chocolate brown, one hunter green with a burgundy red, black and biege...you get the picture. I've been making bright red and royal blue row counters look good for too long!

Bleeding Heart Stitch Markers Whirlpool Galaxy Stitch Markers

Friday, December 17, 2010

Chemistry Saves!


Last month I made a few stitch marker sets using these filigree bead caps on the larger beads. I have a large supply of the Dragonfly Drone charms and the fancy little hearts which are both gunmetal in color, but after making all of these I was down to one pair of the matching bead caps. I also started running out of the gunmetal clasps. The bead caps were purchased from a bargain bin some time ago and I wasn't able to find more in the usual places.

Stitch marker quality lobster claw clasps are also hard to find. You have to buy some, test them and then make sure you can buy them in large quantities for as long as you need them. After giving up on the search for the bead caps, I moved on to the search for the perfect clasps in gunmetal finish. I ended up finding some gunmetal and antique brass clasps that I approved of and to my amazement, this shop also had the bead caps that I needed plated in bright silver!

Though I had never used it, I had a small amount of Liver of Sulfur. So late one night, when I probably should have been heading to bed, I decided to darken some of my bright and shiny filigree bead caps.

Liver of Sulpher Beadcap Oxidation Project
Far Left: the pair of bead caps I had left next to two bright ones Right: DIY antique silver bead caps

I was very pleased with the results! I applied this to some silver plated jump rings and it turned them copper to grayish blue, so I'll need to experiment more with that. It's a fun albeit smelly process and though I'm thrilled about my new supply of gunmetal filigree bead caps, I'll be waiting until I run out of something else "gunmetal" before I do this again.

Wednesday, September 8, 2010

Lots of Stuff Going On!

I've been busy cutting patterns and fabric lately. I'm ready to sew! I've just been really tired after work lately or it has been too hot to turn on the iron. Plus, pattern paper and fans blowing don't mix.

Among to things ready to be sewn are Vogue 8420, Vogue 1189, Vogue 1194, Vogue 9469 and some more Simplicity 7229 skirts! Here is a picture of my glorious pile:


Also, I'm dusting off the old serger which I have not used since the early nineties. Since I have some nice jersey knit tops and dresses in the works, I'm thinking it might be a good time to take it for a spin. It's an 80s machine! No 'easy threading' here and nothing digital on this baby.


I told my mom about all of this earlier and she said she used to do the same thing...have piles of fabric cutouts ready for sewing. My mom looked so pretty and happy tonight, so I took picture.


Ok, as usual...way past my bed time. Goodnight!


Monday, August 30, 2010

Simplicity 2365 Button-down Tunic

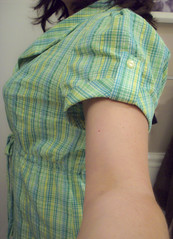
I got the fabric for this a few days after I bought the pattern and even though I knew I had less fabric than the pattern required, I was going to make it work. Oh yeah; it was the end of the bolt AND it's plaid. I decided I wanted The style and sleeve length of view 'C' with the shorter over all length.

Simplicity 2365


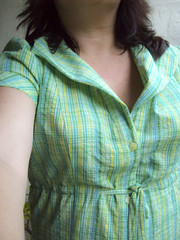
After some fussing around with my pattern pieces, I was able to me everything fit and I prepared it to sew. I had buttons in my stash which matched the greens, the blue and I even had some really cool vintage ones that were turquoise and white. I could not decide which ones to use, so I asked my boyfriend what he thought...he's pretty good at helping me make aesthetic decisions like this. He agreed that they all matched, but thought they all stood out too much and suggested that I use light yellow buttons. This meant I would have to make a trip to the store to buy buttons and matching thread before I could proceed. It was worth it though, as his suggestion turned out to be a perfect fit.

Simplicity 2365 Simplicity 2365

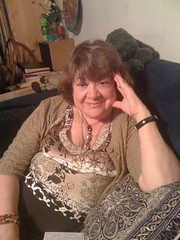
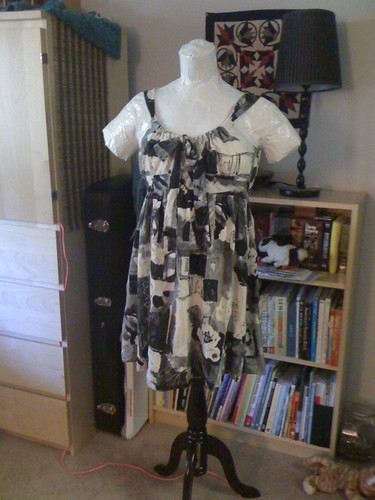
I wore it to work today and I had my boyfriend snap a few pictures when I got home. I did not like any of them! I must be camera shy because the only way I can ever get a picture that I'd dare post on here is when I take it myself. It was this or the dress form!

Simplicity 2365 Simplicity 2365

The thing I liked most about this design is the sleeves. They are pretty cute and were easy to make. I adjusted the buttons on the front for a custom fit. Unless I use this pattern to make some sort of dress, I don't see myself making this again. I have a pattern similar to this, McCall's 8470, which I would like to work on soon. I also might go down a size up top. Because of the bagginess, I thought I could get away with an allover size 16, but I'm spotting slight gaposis on the chest. I can probably fix that at some point...I still love it and will wear it again and again :o)


Wednesday, August 25, 2010

Simplicity 7229 Skirt C and a Half

I felt like sewing something quick and easy that I could also practice pattern fitting using my new dress form. So I picked this "1 Hour" pattern which turned out to be the perfect choice. I made my first muslin and made minor adjustments to the pattern.


Fitting adjustments:
1. I cut my pattern for size 16 and tapered it down to a size 14 right below the waist.

2. This skirt is meant to be worn 2 inches below the waist, but I like wearing mine at the waist. Since view B was too long and view C was too short, I measured for length using another skirt and adjusted the pattern's skirt length accordingly.

Both of these adjustments were very easy to make and I highly recommend this pattern for any beginning level sewer.

Modifications:
1. I lined the entire front yoke with fusible interfacing and the back yoke with the piece from the muslin.

2. Since this fabric is light, I cut the muslin smaller than the skirt and used it to make a lining.

100_4461

3. I used a blind hem. I love blind hems!

I have a feeling I'll be using this pattern again to make a cute and quick skirt! Best thing is that it has a drawstring, so it will be flexible if I lose or gain weight.

Monday, August 23, 2010

Braces - Three Year Anniversary Today

Three Years ago today I got my braces! My impacted tooth is finally coming down into place thanks to some great oral surgery and orthodontic techniques!

It's pretty hot here today, so I'm going to make this quick by posting a few pics from three years ago and then today...

Braces - first day Braces - first day
These were taken the day I got braces. You might notice that there is no room here for my impacted incisor.

Braces 2 years & 8 months
Here I am with space for the impacted incisor which is starting to show and also straight bottom row of teeth!

Anyway, I can't wait to be done!

Sunday, August 22, 2010

Handmade Dress Form

I love sewing! Would I ever want to quit my day job and become a full time seamstress? Eh, probably not. My mom is great at sewing and I've been sewing for a long time - maybe since I was twelve years old. The foundation of my love for sewing definitely comes from my mom. Everything else I learned about this craft I have picked up on my own through research, experimentation and of course, following instructions.

I've almost always followed store bought patterns and lately I have come to the conclusion that I am shaped differently than bodies these sewing patterns are made for. What's the point of taking the time to craft a beautiful garment out of fabric that I love, if it's not going to be tailored to fit me specifically? So, I decided to make a dress form. I looked through some books and searched online for help. Here is what I found to be most helpful:

Mimi Goodwin's $7
video download
The free version of Mimi's video here
The Stitch Lounge Girl's book, Subversive Seamster
Having a ready made dress form on a stand that I could use for my DIY dress form
Having a boyfriend with insulator and other construction skills

I combined some techniques used in the book and in Mimi's video and also added a few of my own.


What I did differently:

1. I used rolled up paper for the neck - there is NO way to wrap my neck in tape....for so many reasons.


2. We constructed a shoulder support using a leftover piece of dowel which happened to be the same size a the width of my shoulders. That dowel was then screwed to the top of the the main dowel and then shoved into place.

3. We hung the dress form upside down and filled it with Touch and Seal spray foam. You have to do this outside because of the fumes and potential for a slight mess factor. This stuff expanded nicely into most of the upper body's curves and did a fine job holding the support dowels in place.


4. After letting the foam do what it does and dry for a few hours I finished stuffing the booty and hip area with Polyfil, working around the hardened foam.

5. We cut a piece of foam board to match the bottom, cut a hole in it and taped it into place.

Here she is modeling the last dress I made before the dress form!